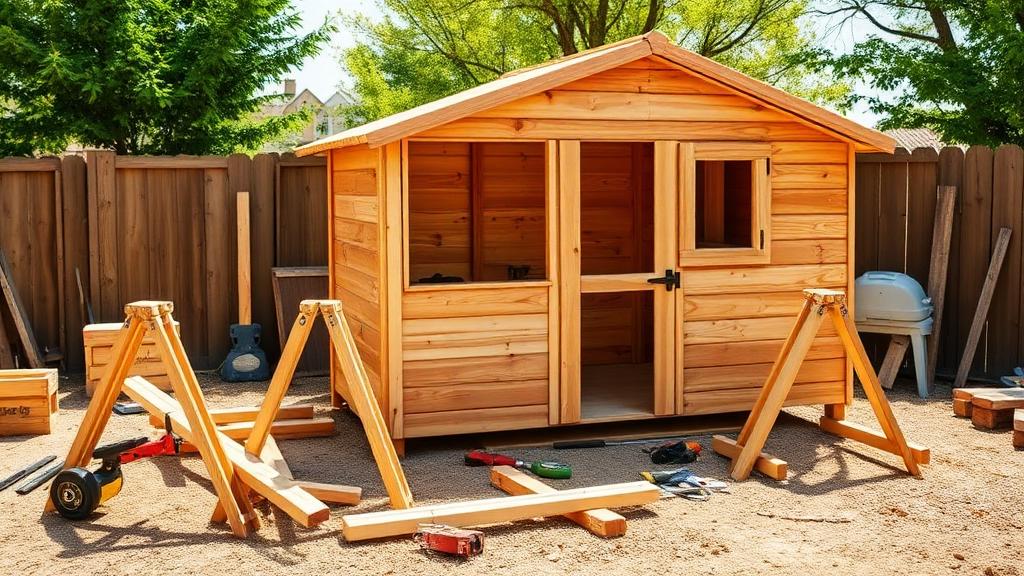
Building your first chicken coop is the moment most backyard-chicken plans either come together or quietly die. Most people stall here. They watch a video, sketch something on graph paper, then freeze in the lumber aisle.
Browse our full collection of free chicken coop plans to compare every design by flock size, style, budget, and climate.
This guide is the build sequence our plan sets use, written out in full. You can finish a basic coop in a long weekend. Or stretch it across 10 evenings, if you only get an hour or two after work.
Where a number here comes from a published table or an extension service, we name the source. Where it’s our own design choice, we say that too.
That distinction matters. Several numbers the hobby repeats as gospel have no source at all. Two of them are in this guide, with the correction attached.
Prefer a dimensioned plan to freehanding it? All of our coop plan sets use these same numbered steps, with a cut table at each one.
Every design has a free preview PDF, and the complete plan books are $4.99 each on Etsy. The 8×8 with a run publishes its full material list and all sixteen assembly steps right on the page.
What you’ll learn
- How to plan the build and pick the right site
- Exact materials and tool list (with budget tiers)
- Step 1: Foundation that won’t rot
- Step 2: Framing that stays square
- Step 3: Walls and siding
- Step 4: Roofing without leaks
- Step 5: Roosts and nesting boxes
- Step 6: Ventilation that prevents disease
- Step 7: A predator-proof run
- The 6 most expensive beginner mistakes
Rather follow proven plans than draw your own? The 4x4 starter, 6x8 coop and 8x12 walk-in sets use this same build sequence. Preview PDFs are free, and the complete cut-list books are $4.99 each on Etsy.
The 2026 cost reality check
Most coop cost numbers online are coop-only, which is why they feel wrong at the register.
The figures below come from the bill of materials each design computes. That’s every board, sheet, panel, pier block, roll of mesh and gallon of paint. Prices are 2026 big-box rates, with no waste allowance.
| Design | Flock | Materials |
|---|---|---|
| 4x8 A-frame tractor | 2-3 hens | $675-$875 |
| 4x4 starter coop + run | 2-3 hens | $1,650-$2,150 |
| 4x8 shed coop + run | 4-6 hens | $2,250-$2,900 |
| 6x8 coop + run | 6-9 hens | $2,700-$3,450 |
| 8x8 walk-in + 8x10 run | 10-13 hens | $3,200-$4,100 |
| 8x12 walk-in + feed room | 14-18 hens | $4,250-$5,450 |
Add $200-400 for tools you don’t already own.
The lines that move those totals are the ones beginners forget to price. Hardware cloth runs about $3.10 a linear foot off a 36-inch roll. Pier blocks are $9 each, a corrugated roof panel is around $34, and screws, caulk and paint add roughly $260 to any build.
Lumber is the swing. Check prices the day you commit, not the day you start planning — a stale quote is the fastest way to blow a budget.
Planning Your Chicken Coop (Week 1)
Before you buy a single board, nail down three things.
Space requirements: more than you think
Plan on 4 sq ft per bird inside the coop, plus 8-10 sq ft per bird in the outdoor run. Virginia Cooperative Extension and Oregon State both give 3-4 sq ft indoors for birds with run access. Four sits at the generous end of a real range. Crowded birds peck each other, develop bald spots, and stop laying.
| Chickens | Min coop | Min run | Coop footprint |
|---|---|---|---|
| 4 birds | 16 sq ft | 32-40 sq ft | 4’ × 4’ |
| 6 birds | 24 sq ft | 48-60 sq ft | 4’ × 6’ |
| 8 birds | 32 sq ft | 64-80 sq ft | 4’ × 8’ |
| 10 birds | 40 sq ft | 80-100 sq ft | 5’ × 8’ |
| 12 birds | 48 sq ft | 96-120 sq ft | 6’ × 8’ |
One counter-intuitive point worth knowing: space needed goes up when outdoor access goes down. Oregon State escalates to 8-10 sq ft of indoor floor per bird where birds are shut in for days at a time. If you get long winters, size the flock off that figure and not the summer one.
Build 25% larger than your current flock. You will get more chickens — nearly everyone does. It’s cheaper to build 6’ × 8’ once than to add on later.
Location: orientation is the cheapest decision you’ll make
A west-facing wall with no shade turns a coop into an oven through a desert or southern summer afternoon. Retrofitting shade cloth, fans and misters onto a badly sited coop costs real money. It never works as well as picking the right spot for free.
The heat data is worth respecting. Above 95°F ambient, a bird can’t shed heat by convection. Her own surface is already 95-100°F, so panting is all that’s left.
Kang et al. (Frontiers in Veterinary Science, 2020) found a sharp temperature spike far more lethal than the same peak reached gradually. Design the site and the venting to prevent the midday spike, not just to survive the peak.
Site checklist:
- Morning sun, afternoon shade — east-facing exposure is ideal
- Good drainage — never the low spot in the yard
- Wind protection — but with airflow (cross-ventilation)
- Close to the house — you’ll visit 2-3 times daily
- Legal setbacks — local zoning, not a number you can look up nationally
- Hose access — for cleaning and refilling waterers
If your summers are genuinely brutal, read the Arizona coop guide before you commit to an orientation.
Permits and HOA: twenty minutes on the phone
IRC R105.2 exempts one-story detached accessory structures up to 200 square feet from a building permit. That’s the model code. Roughly half of adopting jurisdictions tighten it to 100, 120 or 144 square feet, so the national figure isn’t yours until your city confirms it.
- Building permits — check your city’s own threshold, not the model code
- HOA restrictions — can override city law; some HOAs ban poultry outright
- Setback requirements — zoning, entirely local, and the part that carries fines
- Bird count limits — many cities cap hens and ban roosters outright
Our coop permit guide walks through how to find your local rules in 10 minutes.
Materials and tools: what you actually need
Beginners buy every tool the store suggests. Then they skimp on the two materials that decide whether the coop lasts: the mesh and the fasteners.
Lumber by budget tier
Budget:
- Framing: untreated pine 2x4s (about $0.66 a foot)
- Floor framing: pressure-treated skids or 2x6 joists
- Siding: OSB or T1-11 plywood (near $50 a sheet)
- Roofing: corrugated steel panels (around $34 a panel)
Standard:
- Framing: quality pine 2x4s
- Floor framing: pressure-treated 4x4 posts on pier blocks
- Siding: lap siding or cedar 1x6 tongue-and-groove
- Roofing: metal roofing with proper closure strips and drip edge
Premium:
- Framing: cedar where exposed, pine where hidden
- Floor framing: raised platform on piers, galvanized post anchors
- Siding: cedar 1x6 with cedar trim, or board-and-batten as on the 6x8 modern coop
- Roofing: standing-seam metal or architectural shingles
One material note that gets garbled constantly. Cedar shavings are the respiratory concern, not cedar lumber. Plicatic acid is a bedding problem, and cedar boards are preferred near grade for rot resistance.
Modern pressure-treated wood has contained no arsenic since the residential CCA phase-out completed at the end of 2003, per the EPA. Keep it for ground contact and skip it for roost bars and nest boxes.
Hardware cloth, not chicken wire
This is the most important sentence in this guide:
Hardware cloth costs several times more than chicken wire and it is the only material that actually protects chickens.
- Chicken wire: cheap, and it stops nothing. Raccoons tear it, possums squeeze through, snakes ignore it.
- 1/4-inch 19-gauge galvanized hardware cloth: about $3.10 a linear foot off a 36-inch roll. This is the spec.
Two details most guides get wrong.
First, the predator never has to get inside. University of Kentucky Extension ID-245 documents raccoons reaching through the wire and eating what they can reach. The aperture is the binding constraint, not the fence line.
Second, 1/2-inch mesh genuinely stops raccoons, but a least weasel goes through a 1/4-inch gap. That’s why we spec 1/4 inch everywhere, and don’t claim weasel or snake exclusion for anything larger.
On gauge: 19 is our recommendation and the practitioner consensus, and the physics is straightforward at 0.036 inches of wire versus 0.023. No extension service or wildlife agency publishes a gauge threshold, so treat it as sound practice rather than a verified number.
Essential tools
If you don’t already own these, budget $200-400 for a basic kit:
- Circular saw ($25-40 rental/day, $80-150 to buy)
- Cordless drill/driver ($60-150 for a decent kit with two batteries)
- 48-inch level ($15-30)
- 25-foot tape measure ($10-20)
- Speed square ($10-25)
- Safety gear — glasses, gloves, hearing protection ($30-50)
Nice-to-haves (rent or borrow first):
- Miter saw — speeds up clean angle cuts
- Pneumatic nailer — much faster than screws for siding
- Stud finder for attaching to a fence or existing wall
Step 1: Foundation (Day 1-2)
Time: 4-8 hours over 2 days. A solid foundation prevents rot, predator entry, and the lean that turns into a leak.
A coop set flat on soil destroys itself from underneath. Ground moisture wicks into the framing and the underside never dries. The sill plates and floor sheathing rot from the face you can’t see.
In a wet climate a plywood floor on dirt can be soft inside two years. The void underneath is also ideal rat and snake harborage.
Two options
Option 1: Skid foundation — best for level ground, movable coops, the lowest-cost build.
- Cut pressure-treated 4x6 lumber to coop length plus 6 inches.
- Level the ground, remove grass and debris, lay down 2 inches of gravel for drainage.
- Position skids parallel under where the long walls will sit. Shim with concrete blocks until level in both directions.
Option 2: Raised platform on piers — what every plan on this site uses.
- Set a pier block at each corner on compacted 3/4-inch gravel.
- Cut and install pressure-treated 2x8 rim joists around the perimeter, into galvanized post anchors.
- Install 2x6 floor joists 16 inches on center between the rim joists.
- Check for level and square (3-4-5 triangle on the diagonals).
- Sheath the floor with 3/4-inch plywood.
Why 2x6 joists and never 2x4. No published prescriptive span table lists a 2x4 floor joist. AWC DCA6-2015 Table 2 and IRC Table R502.3.1(2) both start at 2x6.
At 16 inches on center a 2x6 spans 8’-4” in the weakest species sold. We cap the clear span at 96 inches and add a girder past that. A 2x4 floor joist can’t be justified against a table at any span.
Frost depth is local. IRC R403.1.4.1 delegates it to your jurisdiction, with 12 inches below grade as the absolute floor. Confirm with the county rather than guessing.
Why raise the coop 12+ inches
- Predator deterrent — Colorado State Extension recommends raising a coop a foot or so to discourage rats, skunks and snakes; go 18 inches or more under real rat pressure
- Drainage — water flows under, not into, the structure
- Cooling shade — chickens use the underneath as a shady retreat in summer
- Storage — feed bins, dust-bath pans, tools all fit under a raised coop
Step 2: Framing (Day 3-4)
Time: 8-12 hours over 2 days. Get this square or every later step fights you.
The order
- Cut all 2x4 studs to length first. Batch-cutting beats one-at-a-time for both speed and accuracy.
- Build walls flat on the ground. Lay the top and bottom plates, mark stud locations 16 inches on center, screw studs in place.
- Frame every opening as a complete assembly — king stud, jack stud, rough opening, jack stud, king stud, with a doubled header over it. An opening eats
width + 6 inchesof wall, and no common stud may land inside it. - Stand walls one at a time with a helper. Screw to the rim joists or floor with 3-inch deck screws.
- Tie corners — screw the adjacent wall corner studs together.
- Check square with the 3-4-5 triangle method. Three feet along one wall, four along the other, and the diagonal should measure exactly five feet.
Size headers by span, not by habit. IRC Table R602.7(1) covers roof load only, on a building 16 feet wide or less, at 30 psf ground snow.
| Clear span up to | Doubled header |
|---|---|
| 42” | 2x4 |
| 60” | 2x6 |
| 76” | 2x8 |
| 93” | 2x10 |
| 110” | 2x12 |
A doubled 2x4 over a 34-inch door is right. The same header over a 77-inch nest-bank opening is not.
Two details worth stealing from our plan sets. Run the bottom plate continuous through door openings and saw it out after the wall is standing. It’s what keeps the wall square while you move it.
And reverse the plate lap at the corners. Run the top plate through on the long walls and the cap plate through on the end walls, so the box doesn’t rack.
Exterior walls carry the rafters, which makes them bearing walls, which is why IRC R602.3.2 wants a doubled top plate. Use one everywhere and you never have to argue the exception.
Pop door, people door, and window
- Pop door — a hen needs surprisingly little. UK welfare regulations set a floor of about 15.7 inches wide by 13.8 inches tall. RSPCA Assured wants 17.7 inches of height. Our sets frame roughly 12 by 14 inches on the small coops, which is our own default. The one experiment on pop-hole width (Gebhardt-Henrich et al., 2006) found width made no measurable difference to range use.
- People door — 24 inches wide minimum. Past about six birds, frame a full walk-in door; a reach-in coop is the most-repeated cleaning complaint in owner reviews.
- Window — south-facing for winter light. Always covered in hardware cloth from the inside, even behind glass.
Step 3: Walls and siding (Day 5-6)
Time: 8-10 hours over 2 days.
Siding tips that prevent the most common failures:
- Start at the bottom and work up. Each course laps over the one below for water shedding.
- Leave a 1/2-inch gap between siding and foundation. This stops moisture wicking up and rotting the bottom edge.
- Check level every 3-4 boards. Small errors compound — an eighth of an inch at the bottom becomes a visible cant at the top.
- Pre-drill cedar and redwood to prevent splitting at the ends.
- Galvanized or stainless fasteners only. Bright screws rust through and streak the siding within two winters.
- Siding is a skin. Anything that carries load — a run rail, a nest bank — gets lagged into framing, never screwed to the face.
Hardware cloth on every opening
Every opening — window, vent strip, pop-door surround, gable end — gets 1/4-inch hardware cloth before any trim goes on. Fasten it with screws and fender washers, not staples alone.
Raccoons pry at edges, and staples back out under sustained pull. No extension source specifies a fastener spacing, so treat ours as practice rather than published fact.
Step 4: Roof (Day 7-8)
Time: 6-10 hours over 2 days. The roof is your chickens’ first line of defense against weather.
Pitch is set by the material
| Material | Minimum pitch |
|---|---|
| Asphalt shingle | 4:12 standard, 2:12 with double underlayment |
| Metal, exposed fastener | 3:12 or steeper |
| Metal, standing seam | as low as 0.5:12 |
| Polycarbonate | about 1:12 |
Our shed-roof designs run 3:12 and the gable sets run 12:12, both comfortably above their material minimums.
Size the rafter against a table
A 2x6 rafter at 24 inches on center carries 117 inches of horizontal span. That’s IRC Table R802.4.1, Spruce-Pine-Fir No.2, 30 psf ground snow, no ceiling attached, L/240 deflection. Span is measured on the horizontal projection, so the slope costs you nothing; the building’s width does.
If you’re at 50 psf ground snow with a wide span, step up a size. And on a gable roof, tie every opposing rafter pair with a 2x4 at top-plate level. A pitched roof pushes outward at the eaves.
IRC R802.3 wants either continuous ties or a designed ridge beam, because untied rafters spread the walls progressively. That tie doubles as framing for a droppings board, which is the cheapest cleaning upgrade in the whole build.
A shed roof has no opposing pairs and no outward thrust, so it needs no ties at all. That’s a real simplicity advantage, not a gap.
Metal vs shingle
Metal roofing (recommended) — 40-60 year lifespan
- Excellent water shedding
- Reflects summer heat
- No plywood decking needed, which saves material and weight
- Raccoons can’t claw through it
Asphalt shingles — 15-25 year lifespan
- Easier first install if you’ve shingled a shed before
- Requires plywood decking underneath
- Absorbs heat, which is bad in hot climates
One caution on metal: it condenses on the underside when the interior air is warm and humid. Vent the underside or leave an air gap.
The mistake almost everyone makes
Corrugated panels invite you to screw through the valleys, because that’s where the panel sits flush on the framing. Every one of those holes sits in the path of running water, and every one becomes a leak.
Always screw through the high ridges, not the valleys. Water runs through the valleys and the ridges stay dry. Use neoprene-washered screws made for metal roofing — deck screws leak even when placed correctly.
Overhang matters
Run the roofing 12 inches past the wall on all four sides. That keeps rain off the siding and away from the foundation, and it’s our standard rafter tail on every plan.
A 4-inch overhang doesn’t do the job. It drips onto the wall instead of clear of it, and south-facing siding usually goes soft first.
Step 5: Interior features (Day 9-10)
Time: 6-8 hours over 2 days. Get this wrong and you’ll have egg-eaters, birds sleeping in the nest boxes, and hens that won’t lay where you want them to.
Roosting bars
Never site a nest box directly underneath a roosting bar. Oregon State and UC Davis both state this plainly — birds on the bar foul the box below them all night. If your layout forces it, fit a slanted cover so droppings slide off.
Keeping the roosts at or above nest-box height is our recommendation rather than a published standard. The reasoning is sound: chickens seek the highest available perch, so boxes level with the bars invite them to sleep in the boxes. Worth knowing the literature is less emphatic than the internet — University of Maryland Extension puts roosts and boxes both at 24 inches without distinguishing them.
Roost specs:
- Length: 10 inches of bar per bird is our generous default. EFSA (2023) gives 18 cm (7.1 inches) as the only evidence-based figure. The legal minimum across EU, UK, Certified Humane and United Egg Producers standards is 15 cm.
- Height: 18-24 inches off the floor, low enough for heavier birds to reach easily
- Spacing: about 12 inches between parallel bars, and 8 inches or more off the wall
- Bearing surface: rounded or flattened, 1-2 inches across
- Stagger, don’t stack — bars directly above each other rain on the birds below, and keep any step between bars under about 30 inches
- Droppings board underneath: a removable plywood panel makes daily cleaning a 30-second job
One popular piece of advice doesn’t survive checking. “Flat 2x4, wide face up, so feathers cover their toes and prevent frostbite” appears everywhere.
No extension or welfare source ties bar shape to frostbite, which is a moisture problem. What is supported is a 1-2 inch bearing surface, easier on the footpad than either a thin dowel or a full 3½-inch face.
Nesting boxes
- Size: 12 by 12 by 12 inches for standard breeds; 15 by 15 by 15 for large breeds
- Ratio: one box per 4-5 hens. RSPCA Assured, United Egg Producers and Certified Humane all cap it at five; hens share, so don’t build one per bird
- Height: around 24 inches off the floor, per Penn State and University of Maryland
- Entrance lip: 4-6 inches tall to keep bedding inside
- External access: a hinged egg door on the outside wall so you collect without going in
Adding boxes to an existing coop is a common retrofit. Our 3-box nest bank is a standalone set for exactly that, with a roll-out option.
Step 6: Ventilation
Moisture and ammonia kill more chickens than cold ever does. Ammonia damages respiratory tissue from about 5 ppm, and humans don’t smell it until roughly 20 ppm — by the time the coop smells wrong, damage has started.
Our design rule: at least 33 square inches of permanent, hardware-cloth-covered opening per bird, near the roofline. That figure is our own default and not a standard, because nobody publishes vent area per bird. What is published is an airflow target: PNW 307 (Oregon State / Pacific Northwest Extension) gives 8 CFM per hen in hot weather.
The outcome that matters is measurable. Keep ammonia at bird height under 20 ppm, which is the figure in USDA’s organic rule (7 CFR 205.241) and Defra’s laying-hen code. Squat to bird height in your own coop; if your eyes or throat sting, you’re already past it.
Kill one piece of folklore while you’re here. The “1 square foot of vent per 10 square feet of floor” rule has no source. It’s usually credited to Prince T. Woods’s Fresh-Air Poultry Houses, which states no ratio at all, and the two extension citations that circulate for it don’t exist.
A floor ratio is also the wrong variable — moisture and ammonia come off the birds, not off the floor.
Why near the roofline: warm, moist, ammonia-laden air rises, so high vents exhaust it continuously. Floor-level openings create drafts at roost height instead.
Ventilation is air exchange above the birds; draft is air movement at bird level. Maximize the first and eliminate the second.
Cross-ventilation: put vents on opposite walls so air moves through rather than sitting.
In a genuinely cold climate the answer is still ventilation, not sealing. Insulation’s real job is keeping surfaces above the dew point, and insulating without venting makes condensation worse.
Our 8x12 insulated coop is built around that pairing. The coop ventilation guide has full schematics for hot, cold and humid climates.
Step 7: Run construction
Time: 8-12 hours over 2-3 days. Most predator attacks happen in the run, not the coop.
Specs
- 8-10 sq ft per bird in the run, counting the shaded space under a raised coop
- 6 chickens need roughly 48-60 sq ft
- Cover overhead — hawks, owls and climbing raccoons all get into uncovered runs
Get water out of the run before the birds go in. Grade it to fall away from the coop, and keep the surface above the surrounding grade. Top it with 3-4 inches of coarse sand or 3/8-inch drain rock.
A run that ponds turns into mud, and mud is where coccidiosis and bumblefoot start.
Adding a run to a coop you already own is its own small project. The 6x8 standalone run and the larger 8x16 and 10x20 sets frame off an existing wall. They carry the same mesh and apron detailing as the full coops.
The apron method (skip the trench)
The traditional approach is a trench with hardware cloth buried deep around the perimeter. It works, and it’s most of a day with a shovel.
The apron is faster and does the same job:
- Lay a strip of 1/4-inch hardware cloth flat on the ground, extending outward from the base of the run fence.
- Fasten it to the bottom of the fence with screws and fender washers.
- Cover it with 2-3 inches of soil or mulch — grass grows through it within weeks.
- Predators dig at the fence base, hit the cloth, and give up.
Our plans bury the apron 12 inches down and 12 inches out. That matches the 12-inch minimum confirmed independently by Kentucky, Maryland and UF/IFAS extension services. Go 18-24 inches where you have persistent diggers.
Do the grading and the run surface before the apron goes in. You can’t regrade under a buried mesh skirt.
Predator-specific notes
- Raccoons — use two-action latches, the kind that need lifting and turning. That’s a sensible precaution rather than a proven one. The popular thumb explanation appears in no extension or wildlife-agency source. Secure the roof; raccoons climb.
- Foxes and coyotes — tall fence, apron as above, and lock the run door at night. Forgetting to close up at dusk is the most-cited cause of predator loss. That’s the argument for framing an auto-door mounting point while the wall is open.
- Hawks and owls — cover the run. Kentucky ID-245 notes hawks and owls see orange netting well, and partial or sagging cover fails. Both are federally protected under the Migratory Bird Treaty Act, so exclusion is the only legal answer.
- Snakes and weasels — 1/4-inch cloth is the threshold. A least weasel squeezes through anything larger. Inspect monthly for gaps.
Full specifications live in the predator-proof coop guide, and the predator identification guide helps you read the evidence after a loss.
The 6 most expensive mistakes
These are the patterns that turn a finished coop into a second project:
1. Using chicken wire. It stops nothing, and the fix is buying the mesh twice. A 6x8 run needs roughly 90 linear feet of 36-inch cloth, or about $310 at 2026 prices.
2. Skipping the foundation. A floor built on soil rots from the underside, and replacing it is most of a rebuild.
3. Inadequate ventilation. Respiratory damage starts before you can smell the ammonia, and it compounds over a winter.
4. Building too small. It’s the most-repeated regret in owner reviews of coop plans.
Adding on later costs far more than the extra framing would have. Build 25% over your current flock.
5. West-facing exposure in hot climates. Retrofitting shade cloth, fans and misters is a permanent tax on a free decision you got wrong once.
6. Sealing the coop tight against cold. Chickens tolerate cold if it’s dry. They don’t tolerate the moisture and ammonia that build up in a sealed coop, and frostbite tracks moisture rather than temperature.
Every one of these is designed out rather than fixed later, which is the argument for building to a dimensioned plan. See the expensive coop mistakes guide for what each one costs to correct after the fact.
Your next steps
Building a chicken coop is one of the most rewarding projects you can take on. The first one is hard and the second one is easy.
If you want dimensioned cut lists and step diagrams:
- 4x4 Starter Coop Plans — small flocks, weekend build (free preview PDF)
- 6x8 Coop Plans — mid-size flocks, weekend-and-a-half (free preview PDF)
- 8x12 Walk-In Coop Plans — 14-18 hens, walk-in with a feed room
- 8x12 gable coop — the same footprint with a 12:12 gable roof and rafter ties
- All free plan previews — every design; complete plan books are $4.99 each on Etsy
Or keep researching:
- Detailed 2026 cost breakdown — line-item materials list
- Coop materials guide — what to buy and what to skip
- Predator-proof coop guide — full hardware-cloth and apron specifications
- Chicken coop size calculator — exact square footage for your flock size