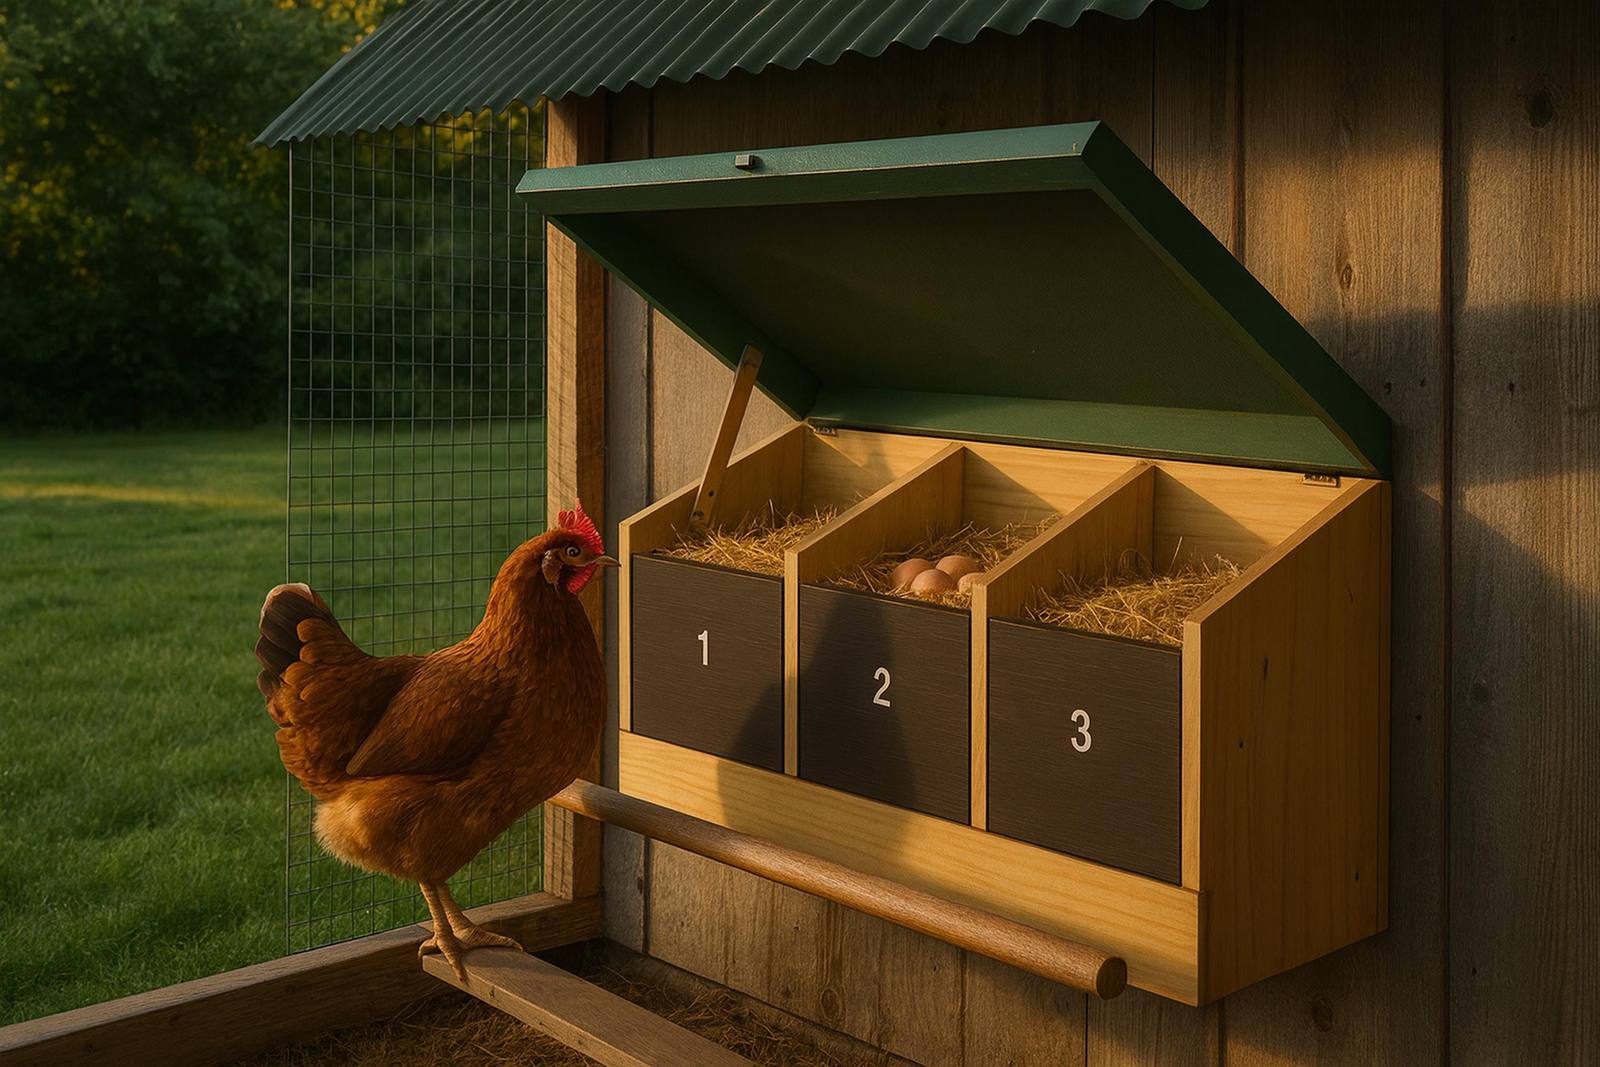

Who needs a separate nest bank
Every coop we draw already has its nest boxes built in, sized to its flock. So this plan is not for those. It is for a coop you already own that came with too few boxes, boxes you can’t stand to clean, or none at all.
Here is how the coops in the line are sized, so you can see what “enough” looks like:
| Design | Hens | Built-in boxes | Hens per box at max |
|---|---|---|---|
| 4x4 starter coop | 2–3 | 2 | 1.5 |
| 6x8 walk-in | 7–10 | 3 | 3.3 |
| 8x12 chicken coop | 12–19 | 5 | 3.8 |
| 8x16 walk-in | 19–26 | 7 | 3.7 |
| This bank | up to 12 | 3 | 4 |
One box per four hens is the working ratio. Three boxes cover up to 12. If you have 13 to 24 birds, build two banks rather than stretching one. If you have six hens and two boxes that work, you don’t need this at all. Extra boxes past the ratio just become places to sleep and foul.
At $240-$330 in materials it works out to about $80-$110 a box. The nesting box guide covers the ratios and box sizes in more depth.
Check the wall before you buy the plywood
This is the mistake the plan is most likely to cost you, so do it first.
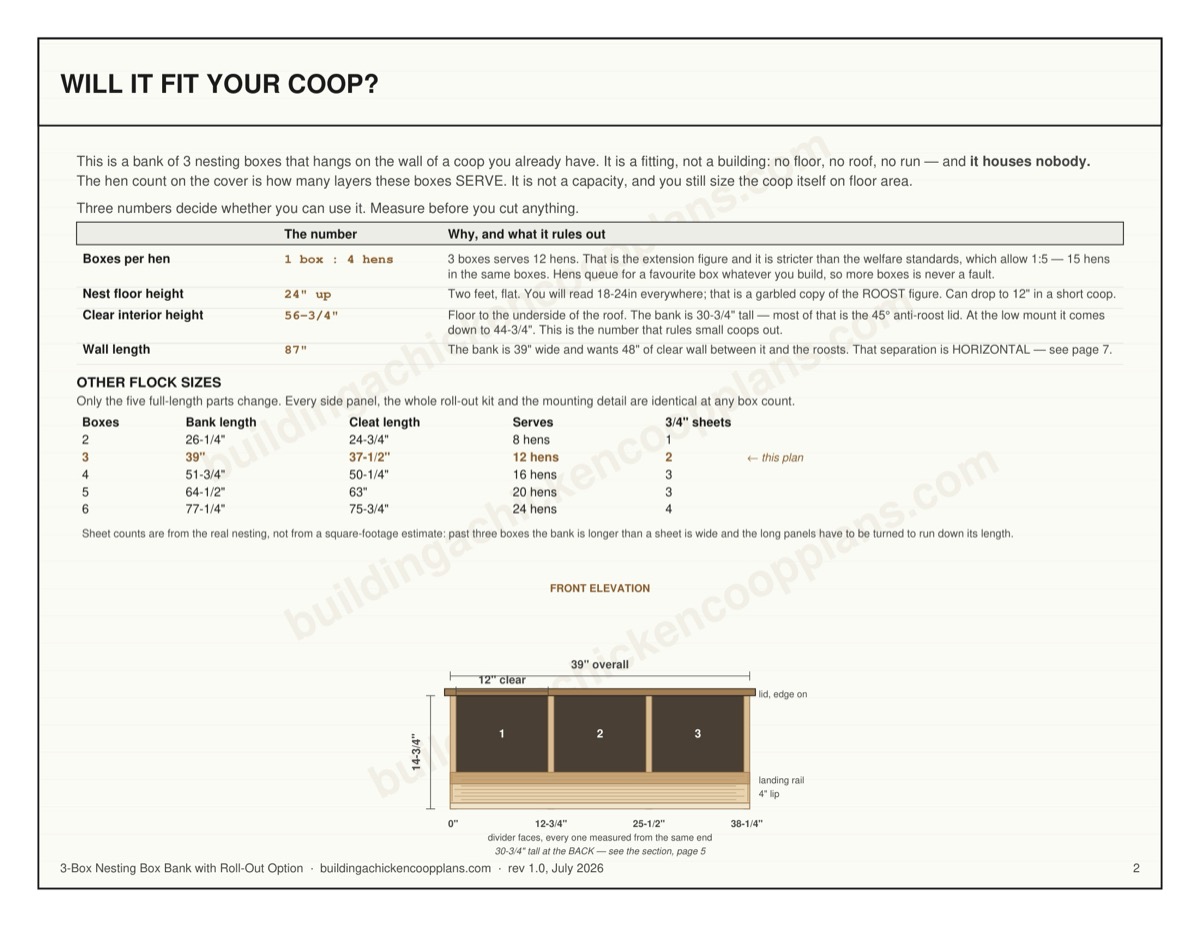
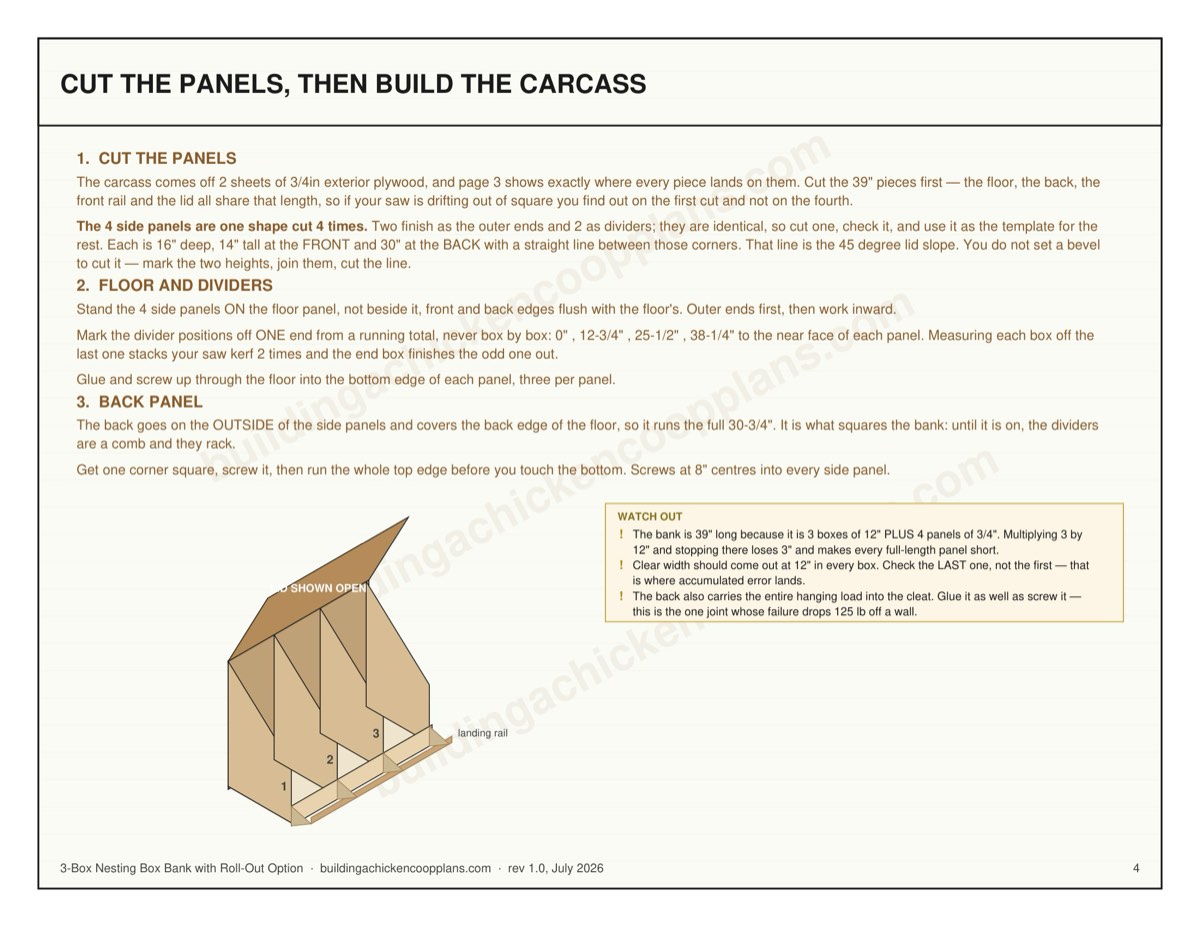
The bank is 39 inches wide and 16 inches deep. The back panel is 30-3/4 inches tall. With the nest floor at the recommended 24 inches, the top of the bank sits about 54 inches off the coop floor. A coop with 36-inch or 48-inch interior walls, which covers most small reach-in coops, does not have the room at that height.
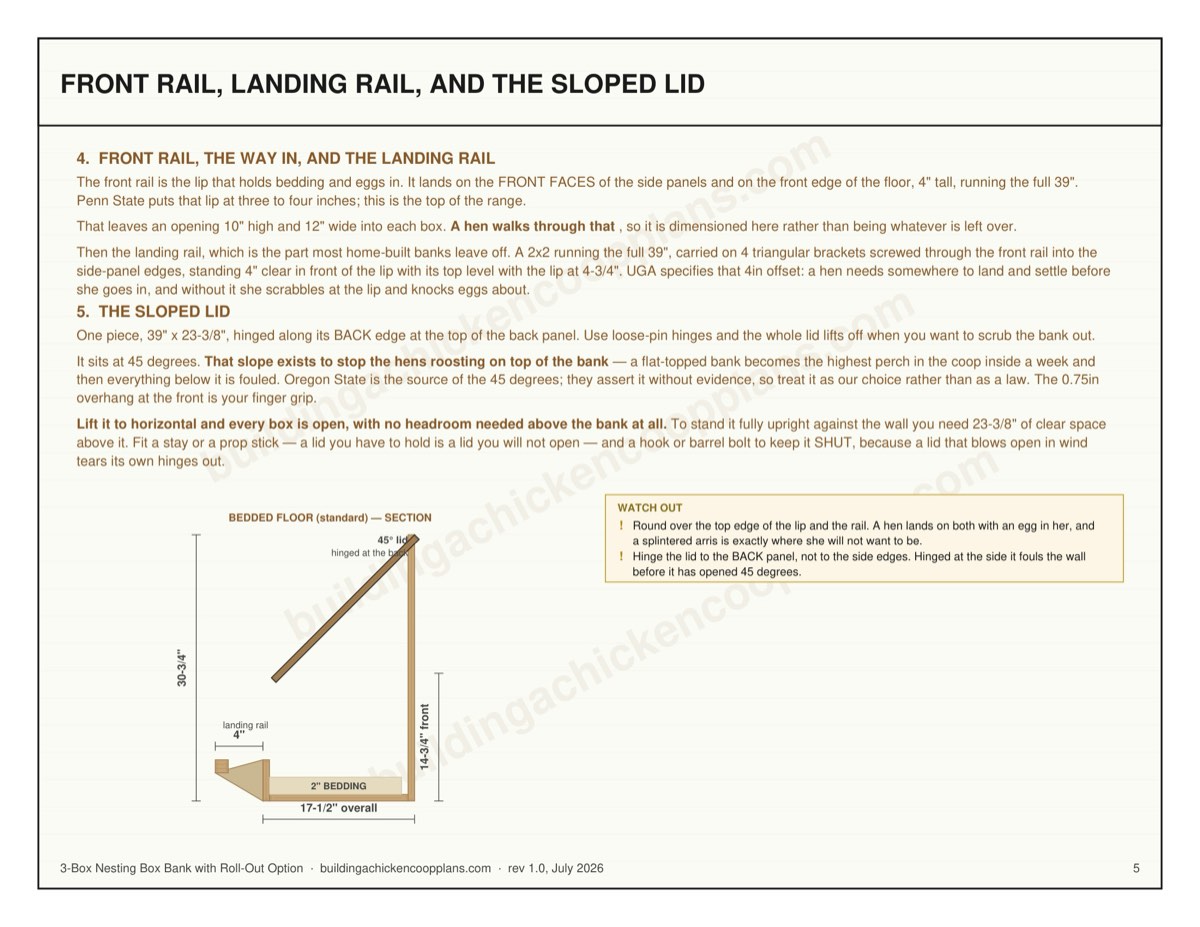
Then check what is above it. The lid is one piece, 39 by 23-3/8 inches, hinged at the back. Lift it to horizontal and every box is open with no extra headroom needed. To stand it fully upright against the wall you need another 23-3/8 inches of clear space above the bank.
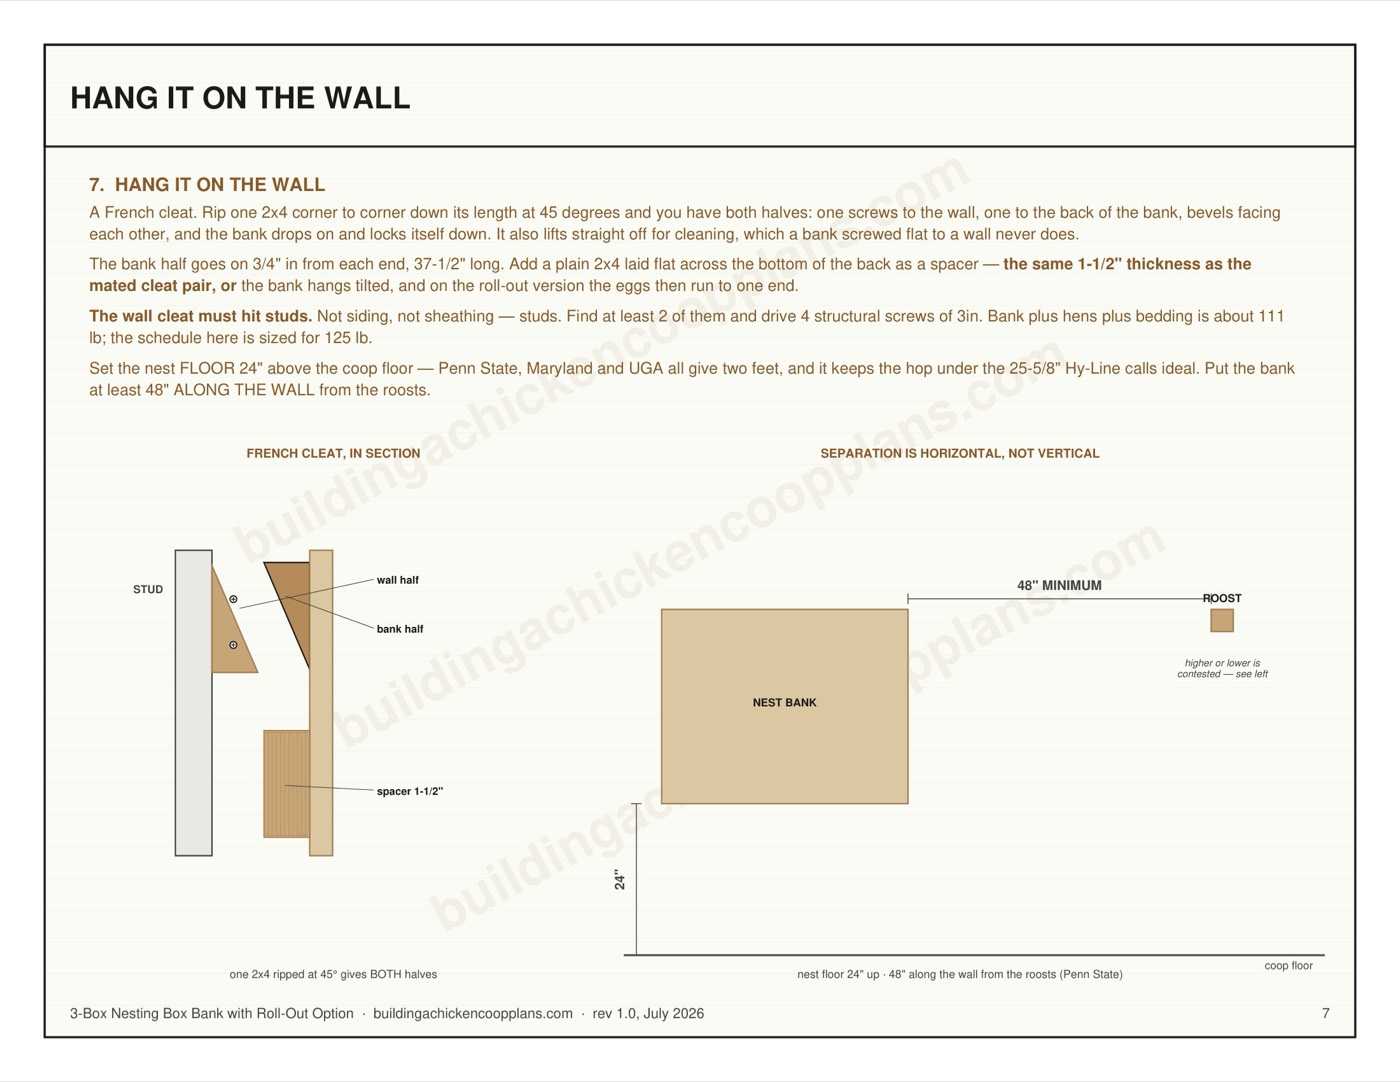
Then find the studs. The wall cleat must hit at least two, with four 3-inch structural screws. Bank, hens and bedding come to about 111 lb, and the fixing schedule is sized for 125 lb. A cleat screwed into siding alone will come off the wall.
Roll-out or bedded: decide before you cut
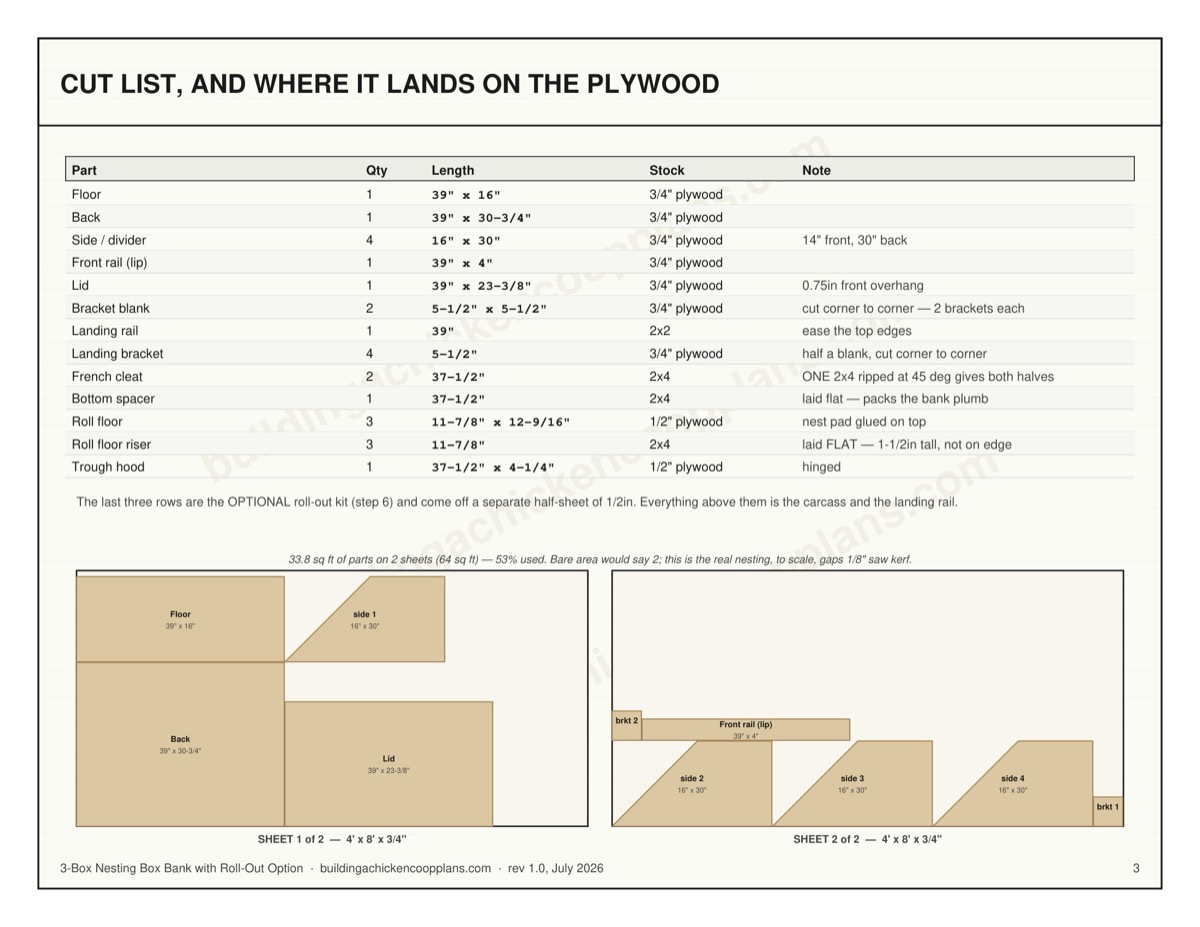
The plan builds either one off the same carcass. The difference is one sheet of 1/2-inch plywood and a short 2x4 riser per box.
Bedded is a conventional nest: about 2 inches of pine shavings or chopped straw, never cedar and never hay, which molds. Extension genuinely disagrees on depth, from 1-2 inches at Maryland to 6 at NC State, so 2 inches is the middle of a real spread, not a precise figure.
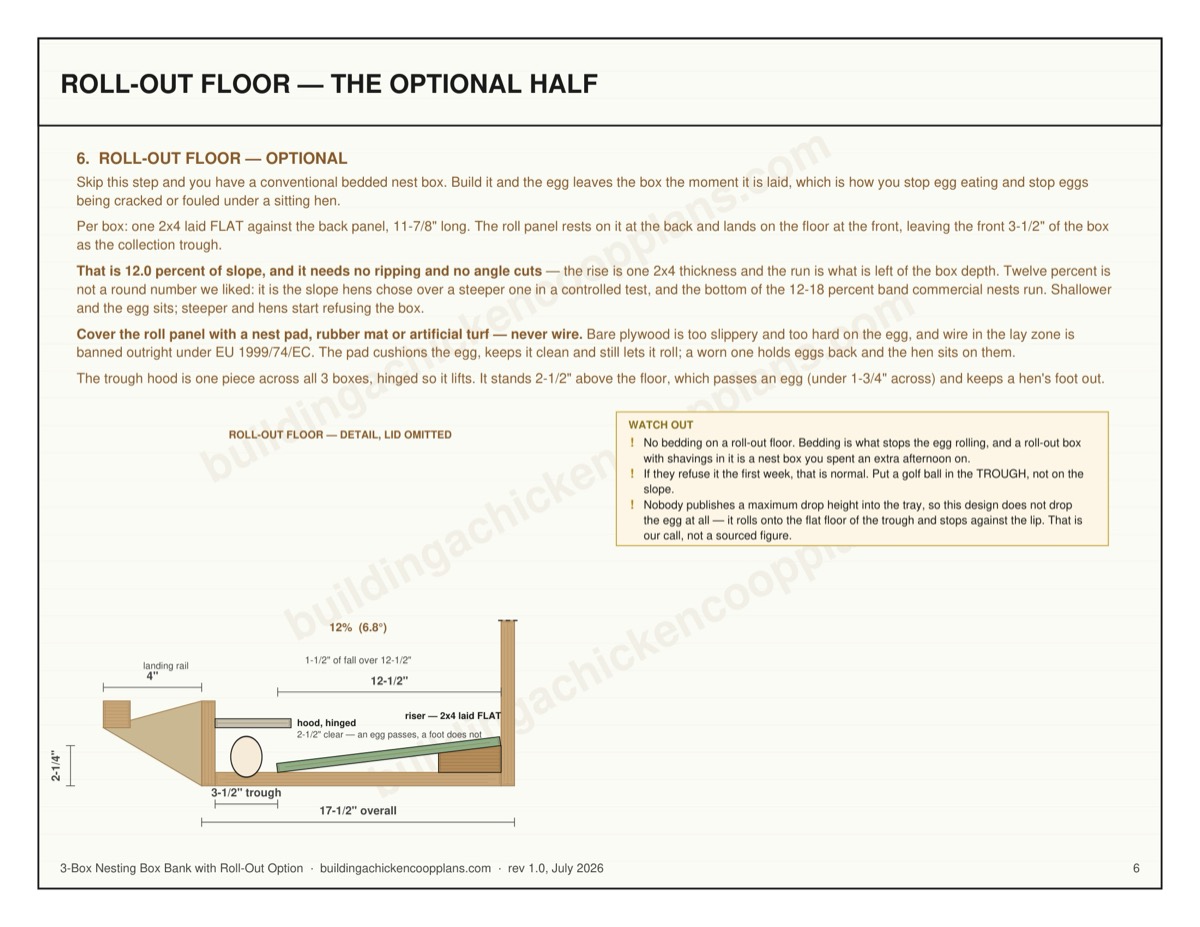
Roll-out tips the egg forward the moment it is laid. Each box gets a plywood floor resting on a 2x4 laid flat at the back, which gives a 12 percent slope with no angle cuts at all. Twelve percent is not a round number the plan liked. It is the slope hens chose over a steeper one in a controlled test, and the bottom of the 12-18 percent band commercial nests run. Shallower and the egg sits; steeper and hens start refusing the box.
The egg rolls into a trough across the front, under a hinged hood that stands 2-1/2 inches above the floor. That passes an egg, which is under 1-3/4 inches across, and keeps a hen’s foot out.
Choose roll-out if you have an egg eater or you collect only once a day. Stay bedded if you want to let a hen go broody. A roll-out floor sends her eggs away as fast as she lays them.
Where it goes in the coop
Three placement rules, each with a source behind it.
Nest floor 24 inches off the coop floor. Penn State, Maryland and University of Georgia all say two feet. It keeps the hop under the 25-5/8 inches Hy-Line gives as ideal.
At least 48 inches along the wall from the roosts. A nest next to a roost is a roost.
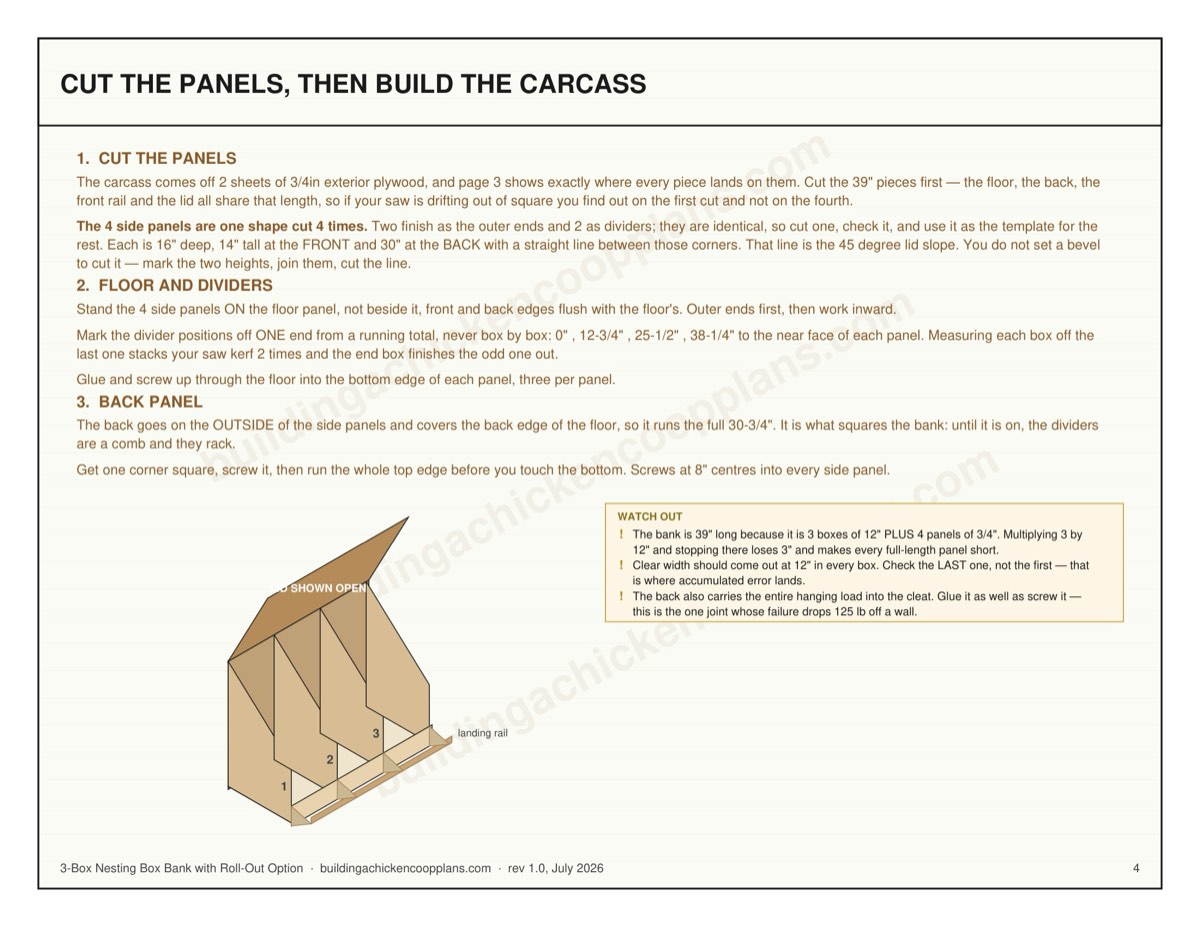
Nothing over it. The lid is sloped at 45 degrees so hens can’t roost on top. Oregon State is the source of that angle, and it asserts it without evidence, so the plan treats it as a choice rather than a law. A flat-topped bank turns into the highest perch in the coop within a week.
Put the bank where it is darkest. Hens lay where it is dim and quiet, and a box facing a bright window or the pop door is a box that gets ignored.
The lip, and the rail most home-built banks leave off
The front rail is a 4-inch lip across all three boxes. Penn State puts that lip at three to four inches, and this is the top of the range. It keeps bedding and eggs in, and leaves an opening 10 inches high and 12 wide into each box.
In front of that sits a 2x2 landing rail, held 4 inches clear of the lip on small plywood brackets. University of Georgia specifies that offset. A hen wants somewhere to land and settle before she steps in. Without it she scrabbles at the lip and knocks eggs about. It costs one 8-foot 2x2.
Built to come off the wall
The bank hangs on a French cleat: one 2x4 ripped at 45 degrees gives both halves. It drops on, locks itself down, and lifts straight off again. The lid uses loose-pin hinges, so it comes off too.
That matters because of mites. The joint where the dividers meet the back panel is the classic hiding place for red mite. Take the bank down two or three times a year, pull the lid, and clean the corners properly. Paint the inside a light color so you can see what is living there. The cleaning guide covers a routine that fits around it.
What this design deliberately does not do
It is not a coop fitting that works on every coop. It needs a wall with the height and the studs described above.
It is not a box for ducks. Ducks lay on the floor and will ignore a bank 24 inches up a wall. Our duck houses put their nests on the floor for that reason.
It does not solve floor-laying on its own. Hens pick a nest in the first week of lay and keep using it, so the plan’s advice is to keep new layers shut in until mid-morning while the habit forms. Once a hen has laid her first clutch on the floor, she tends to keep doing it.