Your roof is the single most important element protecting your flock from weather, predators, and moisture damage. A poorly designed roof leads to leaks, rotting framing, condensation dripping on roosting birds, and heat buildup that can kill chickens in summer. After roofing 40+ coops in climates from Arizona desert heat to Midwest snowstorms, here’s exactly what works — and what fails within two years.
Whether you’re following our chicken coop plans or designing from scratch, the roof is where you should never cut corners. This guide covers material selection, pitch calculations, installation techniques, and the climate-specific adaptations that separate 5-year roofs from 40-year roofs.
Chicken Coop Roof Styles
Shed Roof (Single Slope)
Best for beginners. One flat plane sloping in a single direction. Simplest to build, requires no ridge framing, and naturally directs water runoff to one side.
- • Pros: Easiest to build, cheapest, good for small coops
- • Cons: Less headroom on the low side, limited ventilation at peak
- • Best for: Small coops under 4×8’
Gable Roof (A-Frame)
Most popular for coops 4×6’ and larger. Two sloping planes meeting at a ridge. Provides maximum headroom, excellent ventilation at the peak, and sheds water/snow in both directions.
- • Pros: Great ventilation, good headroom, classic look
- • Cons: More complex to frame, requires ridge board
- • Best for: Walk-in coops and any design with peak ventilation
Saltbox Roof
An asymmetric gable — one long slope on the back and a shorter, steeper slope on the front. Provides a tall front wall (better for doors and egg collection) and a low back wall (less material, better wind resistance).
Roof Pitch: How Steep Should It Be?
Roof pitch is expressed as rise-over-run (e.g., 4:12 means 4 inches of rise for every 12 inches of horizontal run).
Climate Minimum Pitch Recommended Why
Hot / Arid2:123:12–4:12Low pitch = less sun exposure Temperate3:124:12–6:12Good water runoff Heavy Rain4:126:12–8:12Prevents pooling and leaks Snow Country6:128:12–12:12Snow shedding, prevents collapse
For climate-specific roof designs including snow load calculations and heat reflection strategies, see our climate-specific coop design guide.
Roofing Material Comparison
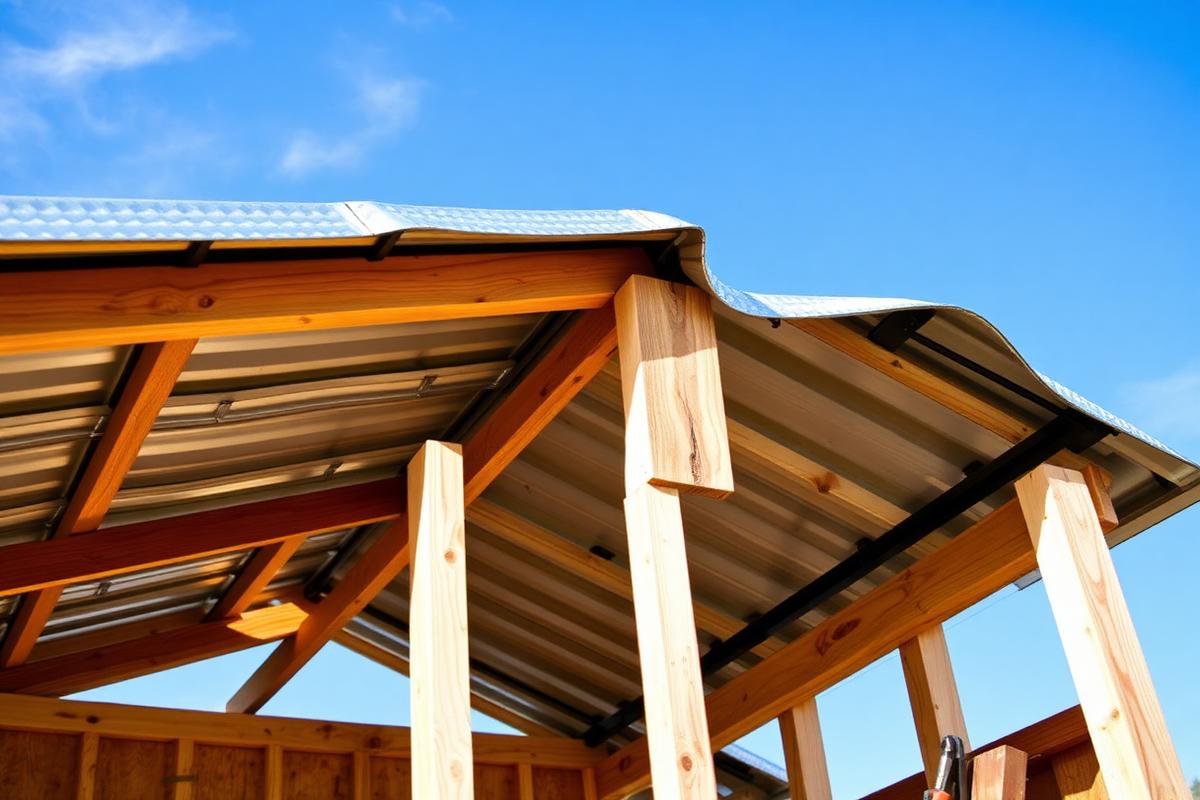
Corrugated Metal (Best Overall)
- • Cost: $1.50–$3/sq ft
- • Lifespan: 40–60 years
- • Pros: Lightweight, fireproof, reflects heat, sheds snow, virtually maintenance-free
- • Cons: Noisy in rain (chickens don’t mind), can be loud to work under
- • Installation: Rubber-gasketed screws on ridges, 6” overlaps between panels
Recommendation Corrugated metal is what we specify in most of our chicken coop plans. It’s the best value when you factor in zero maintenance and 40+ year lifespan.
Asphalt Shingles
- • Cost: $2–$4/sq ft (including sheathing)
- • Lifespan: 20–30 years
- • Pros: Quieter than metal, familiar installation, good for cold climates
- • Cons: Heavier (needs stronger framing), requires plywood underneath
- • Best for: Cold-climate coops where ice dam prevention matters
Polycarbonate Panels
- • Cost: $2.50–$5/sq ft
- • Lifespan: 10–15 years
- • Pros: Natural light reduces artificial lighting needs
- • Cons: Can overheat in summer, UV degradation over time
- • Tip: Use for 30–50% of roof area only, combined with solid metal panels
Roof Overhangs: How Much Do You Need?
Overhangs protect walls, windows, and ventilation openings from rain. Skipping overhangs is one of the most expensive coop building mistakes.
- Minimum: 6 inches on all sides
- Recommended: 12 inches for temperate climates
- Hot climates: 24–36 inches to shade walls (critical in desert environments)
- Rain-heavy areas: 18–24 inches to prevent splash-back on siding
Integrating Ventilation With Your Roof
The roof is your best location for passive ventilation. Hot, moist air rises naturally — placing vents at the highest point maximizes air exchange without mechanical fans.
- Ridge vents: Continuous gap along the roof peak covered with hardware cloth
- Soffit vents: Openings under the overhang that draw fresh air in as hot air exits the ridge
- Gable vents: Openings in the triangular wall section under a gable roof
For complete ventilation sizing and placement, see our detailed ventilation guide.
Installation Tips for Beginners
If you’re new to building, roof installation can feel intimidating — but with the right beginner-friendly plans, it’s manageable in a few hours.
- Frame the rafters first — check for level and square before adding any roofing
- Add sheathing (plywood) if using shingles; skip for metal panels on purlins
- Install drip edge on all edges before laying roofing material
- Start at the bottom edge and work upward — water should always flow over overlaps, not under
- Use proper fasteners — rubber-gasketed screws for metal, roofing nails for shingles
- Seal all penetrations (vents, screws) with appropriate sealant
Safety Warning Even on small coops, work safely at height. Use a stable ladder, never lean over edges, and have a helper steady materials. Metal roofing edges are razor-sharp — wear gloves.
Roofing Cost Breakdown
Roofing typically accounts for 15–25% of total coop building costs. Here’s what to budget for a standard 4×8’ coop:
Material Materials Cost Includes
Corrugated Metal$60–$120Panels + screws + ridge cap Asphalt Shingles$80–$160Shingles + plywood + underlayment + nails Polycarbonate$100–$200Panels + closure strips + screws Rolled Roofing$20–$60Roll + plywood + cement + nails
Frequently Asked Questions
Can I use a tarp as a coop roof?
Only as a very temporary solution (weeks, not months). Tarps degrade in UV light, tear in wind, collect water pockets, and don’t provide insulation or predator protection. Budget $20–60 for rolled roofing instead — it lasts 10x longer.
Do I need plywood under metal roofing?
No — metal panels can be screwed directly to purlins (horizontal 2×4s or 1×4s spaced 24” apart). This saves money on sheathing and actually improves ventilation. Shingles, however, always require plywood sheathing.
How do I prevent condensation dripping on chickens?
Metal roofs can form condensation in cold weather. Solutions: add rigid foam insulation under the metal, use a vapor barrier, or ensure adequate ventilation so moist air exits before condensing. Never seal a coop completely — that’s the #1 cause.