A 4x4 chicken coop is the perfect starter size for 3-4 chickens, providing exactly 16 square feet of indoor space—meeting the critical 4 square feet per bird minimum for healthy, happy hens. This size balances manageable construction costs ($250-400 for quality materials) with practical functionality, making it ideal for beginners who want to start small and learn the fundamentals of chicken keeping.
Browse our full collection of free chicken coop plans to compare every design by flock size, style, budget, and climate. After building my first coop in 2017 (and making every rookie mistake possible), I’ve refined this design through years of desert heat, monsoon storms, and persistent coyotes. This guide provides three complete 4x4 chicken coop plans—budget, standard, and premium—each tested in real-world conditions.
Why 4x4 Chicken Coop Plans Are Perfect for Beginners
The 4x4 footprint hits the sweet spot for first-time coop builders. Here’s why this size consistently outperforms other starter dimensions:
Space Efficiency Meets Chicken Biology
Exactly 16 square feet provides 4 square feet per bird for 4 chickens—the minimum space requirement established by university extension research. This prevents behavioral problems (feather pecking, aggression) that plague overcrowded flocks.
Manageable Construction Scope
A 4x4 structure requires only 8 pieces of lumber for the base frame, keeping material costs reasonable. You can realistically complete the basic version in a weekend, even as a beginner.
Size Comparison - Material Costs Only:
$250-400 4x4 coop
$350-550 4x6 coop
$450-700 4x8 coop
$800-1,200 8x8 coop
Real-world reality check: I initially planned for 6 chickens in my 4x4 coop. Bad idea. The overcrowding led to constant squabbling and damaged feathers. Stick to 3-4 birds maximum.
Left to right: Budget, Standard, and Premium 4x4 coop designs
Basic 4x4 Chicken Coop Plan: Budget Version ($250-300)
This stripped-down design prioritizes functionality over aesthetics, perfect for beginners who want to test chicken keeping without major investment.
Design Overview
- • Dimensions: 4’ x 4’ x 4’ high (sloped roof)
- • Capacity: 3-4 standard chickens
- • Construction time: 6-8 hours over 1-2 days
- • Skill level: Beginner (basic carpentry)
- • Foundation: Pressure-treated skids on blocks
Key Features
- • Elevated 12 inches for predator deterrence
- • Single roosting bar at 18 inches high
- • Two nesting boxes (for 3-4 hens)
- • Front access door for easy cleaning
- • Hardware cloth on all openings
Cost Breakdown - Budget Version
Material Qty Cost
Pressure-treated 2x4x8’ (skids)2$14 2x4x8’ pine framing8$32 2x2x8’ pine (roost, trim)3$12 1/2” plywood sheathing3 sheets$75 Metal roofing or shingles20 sq ft$35 1/2” hardware cloth 19-gauge25 sq ft$40 Hinges, latches, screwsVarious$25 Concrete blocks8$20 Total Materials$253
⚠️ Budget Version Limitations
This design sacrifices long-term durability for upfront savings. Expect to upgrade or replace components within 2-3 years in harsh climates.
Standard 4x4 Chicken Coop Plan: Best Value ($350-450)
This is my recommended starting point for most beginners. It balances cost with essential features that prevent common problems and reduce long-term maintenance.
Design Improvements Over Budget
- ✓ Two access points (front door + removable back panel)
- ✓ Dedicated ventilation with adjustable shutters
- ✓ Sloped roof for better water runoff
- ✓ Reinforced frame for enhanced durability
- ✓ Predator-proof latching system
- ✓ Integrated droppings board under roosts
Technical Specifications
- • Dimensions: 4’ x 4’ x 5’ high at peak
- • Roof slope: 4:12 pitch for weather protection
- • Ventilation: 2 square feet near roofline
- • Roosting space: 32 inches (8” per bird)
- • Nesting boxes: 12” x 12” x 12” (two boxes)
- • Foundation height: 16 inches off ground
Cost Breakdown - Standard Version
Material Qty Cost
Pressure-treated 2x4x8’ lumber12$84 2x2x8’ pine (roost, interior)4$16 1/2” plywood exterior grade4 sheets$120 Metal roofing panels20 sq ft$45 1/2” hardware cloth 19-gauge30 sq ft$50 Two-step latches (raccoon-proof)2$18 Hinges, screws, miscellaneousVarious$35 Concrete blocks/gravelFoundation$25 Total Materials$393
Why this is my go-to recommendation: The standard version has survived 5 years in Arizona heat, monsoon winds, and persistent coyotes. The dual access points make maintenance manageable.
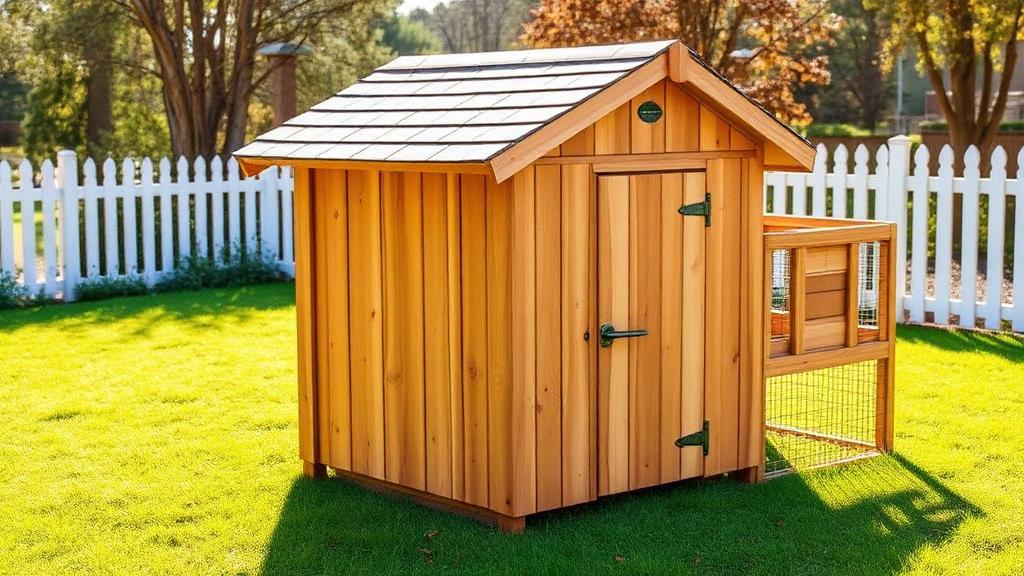
Premium 4x4 Chicken Coop Plan: Maximum Features ($500-650)
For beginners who want to build once and enjoy for years, the premium version includes convenience features and superior materials that transform daily chicken care.
Premium Features
- ⭐ Automatic door with timer/light sensor
- ⭐ Cedar construction for pest resistance
- ⭐ Integrated nest box with external egg collection
- ⭐ Ventilation system with seasonal adjustments
- ⭐ Full-height walk-in design (6’ peak)
- ⭐ Removable droppings tray
- ⭐ Predator-proof feed storage compartment
Long-term Value Proposition
- • Automatic door: Eliminates #1 cause of predator losses
- • External egg access: No entering coop daily
- • Walk-in height: Comfortable maintenance
- • Cedar construction: 15-20 year lifespan vs. 5-8 for pine
💡 Premium Version Reality Check
The automatic door alone prevents more predator losses than any other single upgrade. It pays for itself within the first year by eliminating the 6 PM panic of “Did I remember to lock up the chickens?”
Basic coop framing structure with 2x4 lumber, showing floor joists, wall studs, and roof rafters
Complete Materials List & Tool Requirements
Essential Tools
- 🔧 Circular saw or miter saw — Critical for accurate cuts
- 🔧 Drill/driver — 18V cordless minimum
- 🔧 Level (4-foot) — Essential for square construction
- 🔧 Speed square — For marking cuts and angles
- 🔧 Tape measure (25-foot) — Standard construction length
- 🔧 Safety glasses & work gloves — Non-negotiable
Money-Saving Tips
- 💰 Buy lumber in standard 8-foot lengths
- 💰 Hardware cloth from farm supply (30-40% cheaper)
- 💰 Shop construction salvage for materials
- 💰 Buy hinges and latches online
Quality Splurges That Pay Off:
- • 19-gauge hardware cloth (23-gauge tears easily)
- • Galvanized screws (regular rust in 2-3 years)
- • Two-step latches (cheap latches = dead chickens)
Step-by-Step Construction Guide
Build order matters. Following this sequence prevents the “I wish I’d done that first” moments that plague DIY projects.
Phase 1: Foundation and Frame (Day 1 Morning)
Step 1: Prepare the Foundation
- • Level the ground using a 4-foot level
- • Position concrete blocks 4 feet apart (parallel lines)
- • Place pressure-treated 2x4 skids on blocks
- • Check diagonal measurements for square
Step 2: Build the Base Frame
- • Cut four 2x4s to 48 inches (exact measurement)
- • Assemble rectangle using 3-inch deck screws
- • Pre-drill holes to prevent splitting
Phase 2: Wall Construction (Day 1 Afternoon)
Step 4: Frame the Walls
- • Front and back walls need 3 studs each
- • Side walls need 2 studs each
- • Pre-cut door opening (24” wide minimum)
- • Frame walls flat on ground, then raise and attach
Step 5: Install Ventilation Openings
- • Cut openings 2 inches below roof line
- • Minimum 6” x 12” on each end wall
- • Frame openings with 2x2 lumber
Phase 3: Interior Features (Day 2 Morning)
Step 6: Install Roosting System
- • Mount roost bar 18-20 inches off floor
- • Use 2x4 laid flat (wide side up)
- • Sand edges smooth to prevent foot injuries
Step 7: Build Nesting Boxes
- • Construct 12” x 12” x 12” boxes
- • Mount 12-16 inches off floor (below roost)
- • Add 4-inch front lip to contain bedding
Phase 4: Roofing and Finishing (Day 2 Afternoon)
Step 8: Install Roof Structure
- • Cut rafters for 4:12 slope
- • Install 1/2” plywood sheathing minimum
- • Add metal roofing with proper overlap
- • Include 6-inch overhang for weather protection
Step 9: Secure with Hardware Cloth
- • Cover ALL openings with 1/2” hardware cloth
- • Staple every 2 inches with heavy-duty staples
- • Overlap seams by 1 inch minimum
⏱️ Realistic Time Estimates
- • Experienced DIYer: 8-10 hours
- • Intermediate builder: 12-15 hours
- • Complete beginner: 16-20 hours
- • Add 25% if building alone vs. with helper
7 Costly Mistakes Every Beginner Makes
I’ve made every one of these mistakes, some multiple times. Learn from my expensive education.
My most expensive mistake: I lost 3 chickens to a raccoon because I used cheap latches and chicken wire. That $30 savings cost me $60 in replacement birds plus the heartbreak. Don’t repeat my mistake.
Future Expansion Options
The beauty of starting with a well-designed 4x4 coop is the ability to expand as your flock grows or your ambitions increase.
Add Attached Run
Timeline: Immediately or Year 1
Cost: $150-300 for 8x4 run
Provides secure outdoor space without major construction. Attach 8x4 run to one side, doubling total space.
Build Modular Second Coop
Timeline: Year 2-3
Cost: $300-500 for matching 4x4
Separate flocks, breeding programs, or quarantine space. Share infrastructure (water, feed storage).
Convert to Permanent Structure
Timeline: Long-term (5+ years)
Cost: $1,000-2,000 for 8x12 coop
Maximum convenience and capacity. Use 4x4 as brooder/quarantine, build large walk-in coop.
Start Building Your Dream Coop Today
A 4x4 chicken coop represents the perfect entry point into backyard chicken keeping. The manageable size keeps costs reasonable while providing everything your small flock needs to thrive.
My Recommendation
Start with the standard version. It balances cost with essential features that prevent the most common problems. Once you’ve mastered chicken keeping basics, the upgrade path is always there.
Remember: the best chicken coop is the one that gets built. Don’t get paralyzed by perfect plans—these designs work, and your chickens will appreciate any shelter that meets their basic needs for space, security, and comfort.